Since the days are getting shorter and the gift-giving season is upon us, I thought I might post the occasional tutorial on handmade/crafty/diy projects. Or maybe I'll just do the one! Anyway -- the work on this set of instructions was mostly done in 2005 when I originally posted the tutorial photoset on flickr. This is mostly that, although there is some further HARD WON knowledge here for your paper wallet-making edification.
some things you should know about the paper wallet:
+++ paper wallets and the washing machine are HIGHLY INCOMPATIBLE.
+++ there is nowhere to put change. I use mine with a purse, mostly, so it isn't an issue.
+++ it's very handy for when you just want something to put some money and ID in when you don't want to carry a purse. (... and don't mind maybe having change in your pocket.)
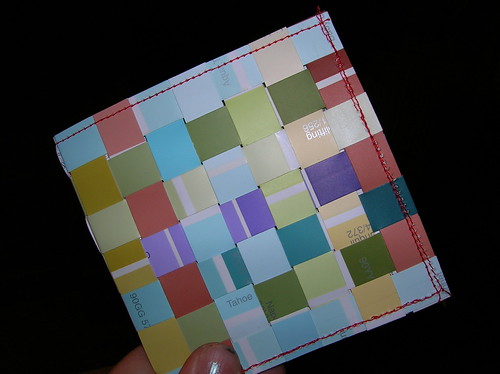
+++ they're sturdier than you'd think. I used the one pictured in this post for over a year. They wear out a little faster if they're constantly in your pocket, but even so... pretty impressive for a paper wallet! Weaving is the key to making it stronger than the materials would suggest.
+++ however, not everything lasts forever so don't feel bad when it's time to make a new one -- especially if you're using something you've recycled! (I was just thinking tonight that magazine covers would probably be heavy enough to work...)
+++ in addition to paint chips (and possibly magazine covers) you can also use regular old cardstock. (My friend Leslie made a very cool wallet out of cardstock she decorated with rubber stamps.) OR, if you long for a more polished or coordinated look, heavier-weight scrapbook papers would also work. There are some really wonderful papers out there right now!
+++ this is easier than you think. You can do it!
materials needed:
+++ an assortment of paint chips or other medium to heavy-weight paper of your choosing.
+++ sewing machine. It is straight-stitching only, so you don't need anything fancy!
+++ ruler/scissors or some kind of paper cutting thing.
+++ a little bit of patience. You might want to give yourself permission to let the first one be a practice wallet. ( it will most likely be awesome, but don't feel bad if it's wonky and crooked. Mine certainly was.)
the tutorial:
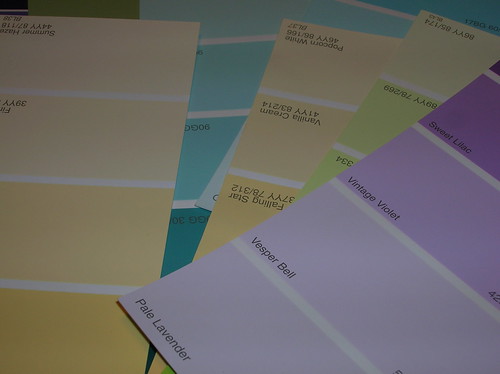
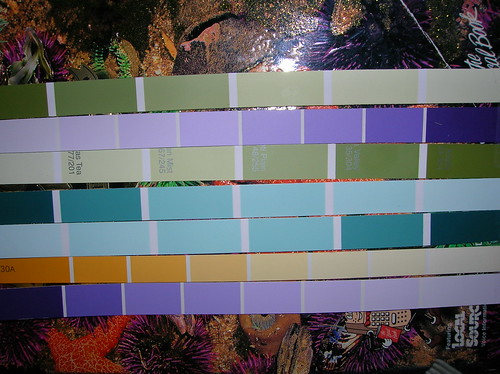
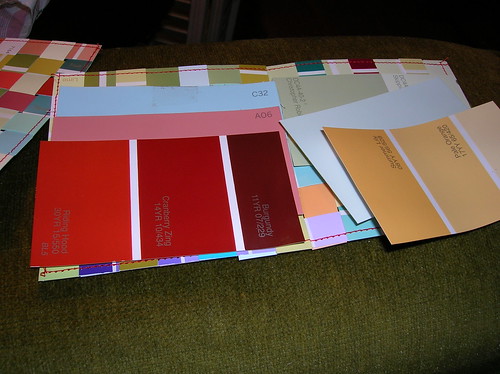
paint chips - I had a big bag of them hanging around from various painting projects. Select some colors that you would like to work with.
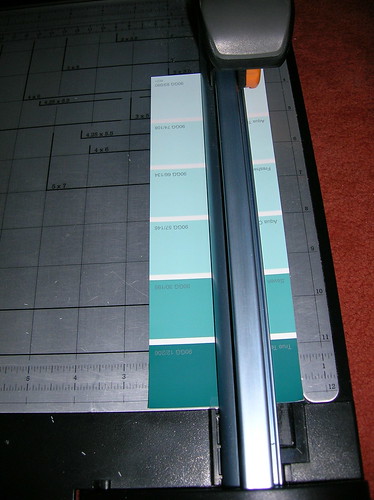
cut paint chips into 1/2" strips. I used longer paint chips (about 8-9") for the lengthwise strips so I wouldn't have to piece the wallet.
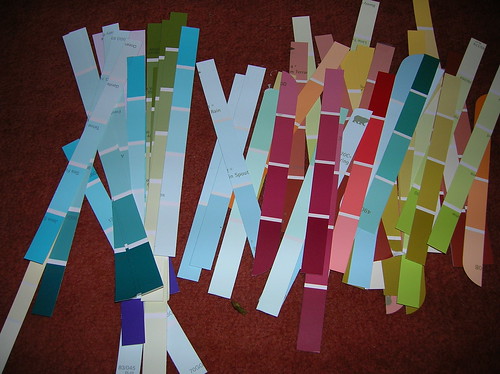
assemble assorted paint chip strips. (or other papers. I will make one out of something else and post a picture, someday.)
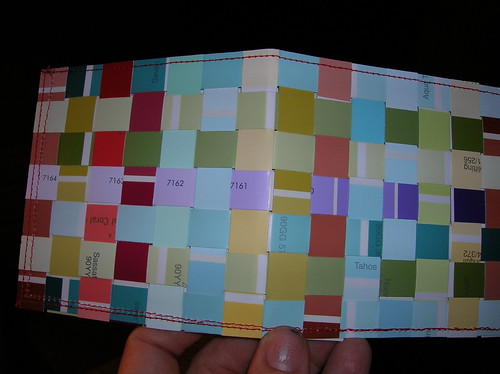
lay 7 long strips side by side. I taped them down on one end to keep them stable. I worked on a phone book in my lap, but a table or piece of cardboard would also work.
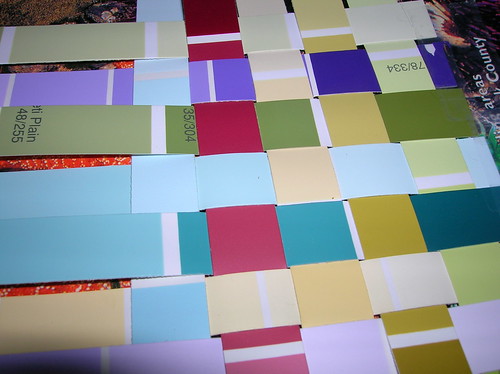
start weaving other paint chip strips crossways through the long chip strips. You can make a pattern, or just grab and go. (I am a grab and goer! You can do really interesting to look at yet uncomplicated to execute things with color selection. Not that I did in this example, but it IS possible.) You don't want to weave too tight or it will be difficult to close your wallet.
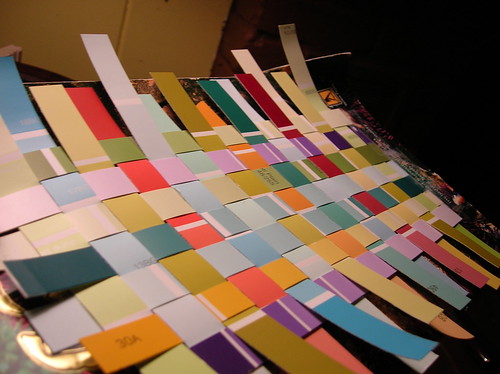
keep adding strips until you are to the end of the long strips.
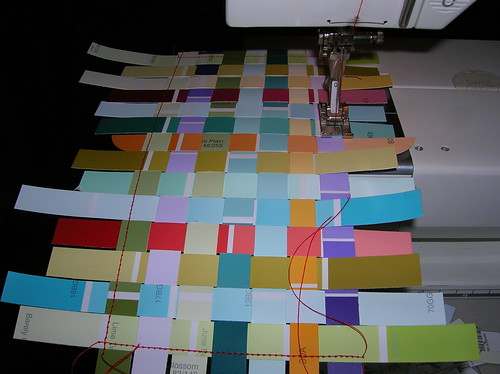
sew around the edges to keep everything in place. Once done sewing, trim off excess edges. You actually need two of these pieces in order to complete a wallet - one for the outside, and one for the inside. This will make good use of the one that turns out (inevitably) crooked or otherwise undelightful. You can stick that one on the inside, and the better looking one on the outside.
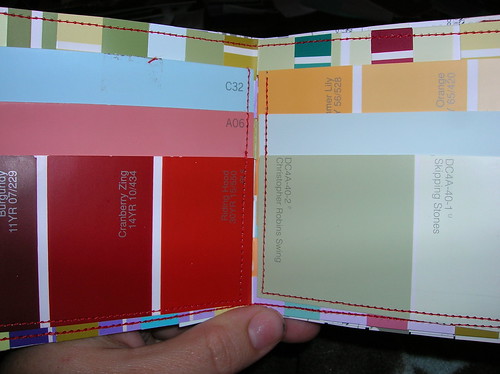
cut additional paint chips to correct size to hold credit cards. (about 3 3/4", but be sure to measure for yourself!) Sew around three edges, starting with the top pocket, working down. after you get the pockets sewn on, sew the two sides of the wallet together, making sure to leave the top open.
ta-da! (I would like to note that that is paint and not dirt under my 2005 thumbnail.)

inside the paint chip wallet. (money and atm receipts go here!)
Voila -- Paper wallet! They are very fun and inexpensive to give as gifts, or you could just make and stockpile them for yourself.


That is most definitely dirt under your 2005 nail. And as a matter of fact I think that I just saw that dirt under that same nail just the other day. I know you are anti the whole anti-bacterial thing but a little soap and water should be okay, right? Or maybe it was new dirt caused by using your hand as a rake to collect leaves for someone? Or is it possible that I am bored and making it all up? Thanks for the detailed details regarding paper wallets. I think that it might be something I could do. We'll see.
ReplyDeletePaper wallets - my favorite craft of all time! So little work for such amazing results!
ReplyDeleteI will have to take your word for the "so little work"...it looks so super involved and although I do have access to a sewing machine, I have never used one. Shocker, I know. Maybe sometime I can watch someone start a wallet? I do better when I observe.
ReplyDeleteNo! it's paint, I swear! I think you could make one, no problem bbd. We'll have to arrange a wallet day where we all make one.
ReplyDeleteLeslie, YAY! They are fun! Didn't you make one that was black/black shiny/matte? or was that in my imagination?
It could most deinitely be a rainy day project, and we do have tons of rainy days ahead of us just waiting to drag us down.
ReplyDeleteyou're actually a good webmaster. The website loading speed is incredible. It sort of feels that you're doing any
ReplyDeleteunique trick. Also, The contents are masterpiece.
you've done a fantastic process in this matter!
My web page :: numerology calculation
Heya i am for the primary time here. I came across this
ReplyDeleteboard and I find It truly helpful & it helped me out much. I hope to present something back and
help others like you helped me.
Also visit my web blog :: acne cure
I was recommended this web site by my cousin. I am not sure whether this post is written by him as nobody else know
ReplyDeletesuch detailed about my trouble. You are amazing!
Thanks!
My web page perfumes